Docs · Project & frames
The Project and Frames screens
The Project screen
The Project screen defines the folders every stack needs. Each row has a Choose… button, an ✕ to clear, and shows the selected path.
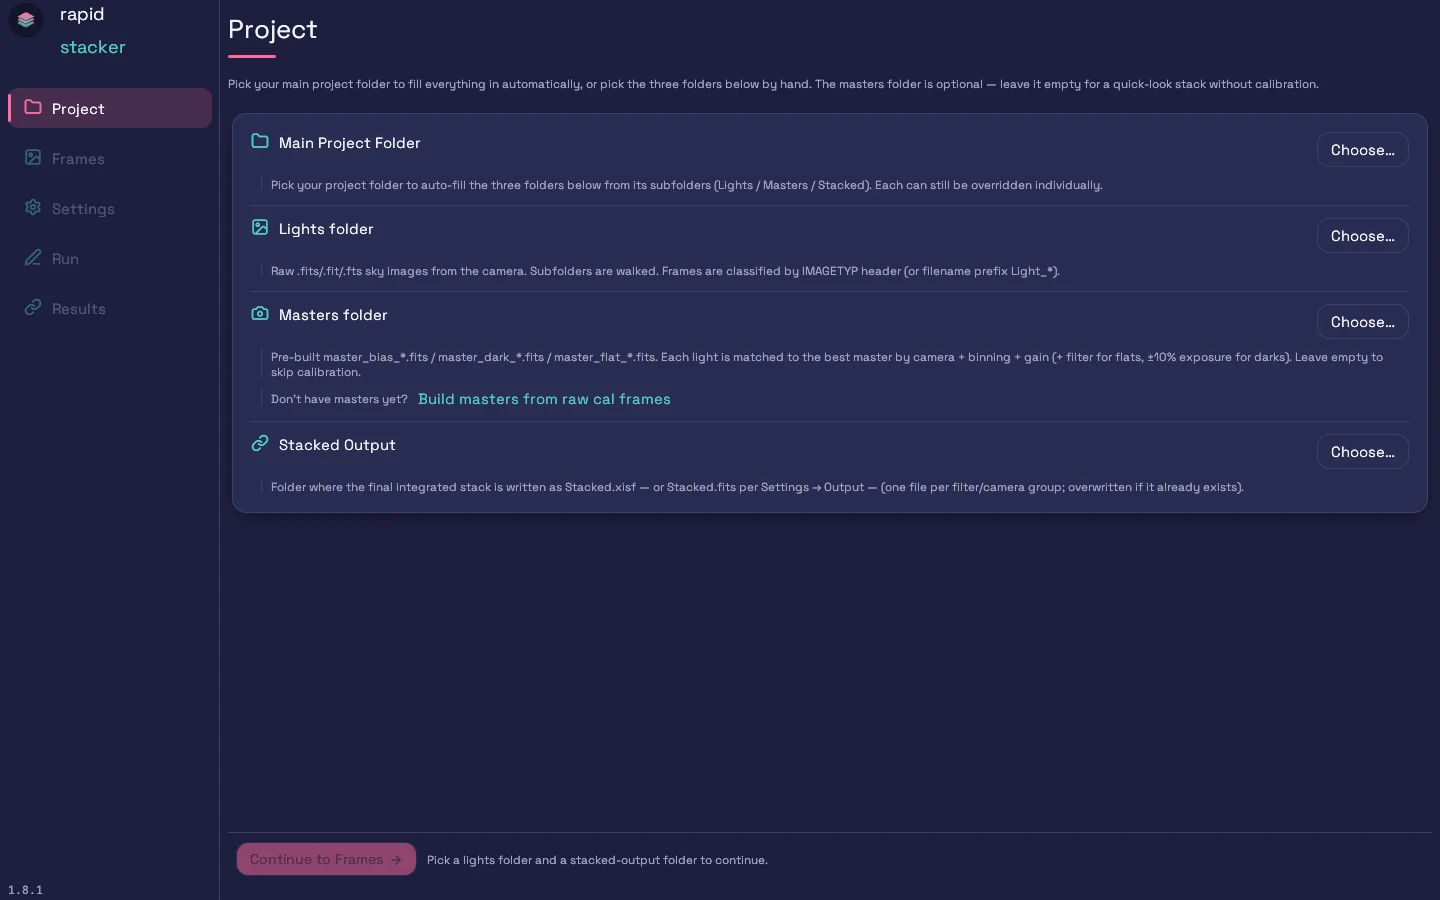
- Main Project Folder — pick your session’s top-level folder and the rows below are selected from it automatically. Lights resolve to the folder spanning all light-frame subfolders (multi-night
date/LIGHTlayouts work), andMasters/Stackedsubfolders are matched by name. Since 1.8.4 the Build Masters input (the project folder) and output (itsMastersfolder) are set too, Stacked Output always follows the project you pick, and if your current masters folder holds files and sits outside that project you’re asked whether to keep it as a calibration library (below). Each row can still be overridden individually, and re-picking the same folder re-runs the auto-selection. - Lights folder — your raw
.fits/.fit/.ftssky images, including fpack / Rice-compressed.fits.fzfiles (since 1.8.3; calibration frames may be compressed too). Subfolders are walked recursively. Frames are classified by theirIMAGETYPheader (or aLight_*filename prefix). - Masters folder — pre-built
master_bias_*/master_dark_*/master_flat_*files. Each light is matched to the best master by camera + binning + gain (plus filter for flats, and ±10% exposure for darks). Leave it empty to skip calibration entirely — useful for a quick-look stack. The “Don’t have masters yet? Build masters from raw cal frames” link jumps to the Build Masters flow. In calibration-library mode the row is labelled Masters folder (bias & darks) and only its bias and dark masters are used. - Flat masters (this project) — shown only in calibration-library mode (1.8.4+): the folder holding flats built from this project’s flat frames. Flats are taken only from here, so a stale flat from another project with the same filter is never matched. Clear the row to go back to taking every master, flats included, from the masters folder above.
- Stacked Output — the folder where finished stacks are written (one
Stacked_….xisfper filter/camera group; existing files are overwritten).
Calibration library. Bias and darks can be reused across many projects, but flats can’t — dust and the optical train change between projects. When you keep a library, it supplies bias and darks while flats come only from this project’s own folder, and Build Masters builds just this project’s flats and dark-flats, borrowing the library’s bias to calibrate them. If a run finds no matching master flat for some lights, the Run screen says so — “No master flat for Ha (…) — those lights are calibrated without a flat” — instead of skipping the flat silently.
Helper dialogs may appear. If the project folder lacks Masters/Stacked subfolders, Rapid Stacker offers to create them, and asks the keep-the-library question when it applies — nothing is created without your approval, and Not now leaves those rows empty for you to pick by hand. The same check runs when the app opens: if the saved project’s Masters, Stacked, or flat-masters folder no longer exists, you’re offered to create it. And if your masters (or flat-masters) folder contains no FITS files, it warns that the stack would run without those masters and offers to route you into Build masters… first.
Continue to Frames activates once the lights and stacked output folders are set — the masters folder is genuinely optional (leave it unset for an uncalibrated quick-look; the Run screen notes that calibration will be skipped). Until then the message names exactly which folder is still missing, and the sidebar’s later steps stay greyed out with the same explanation on hover. Once a step’s prerequisites are met you can jump straight to it from the sidebar — you don’t have to walk the wizard one screen at a time.
The Frames screen
The Frames screen lists every discovered light so you can inspect and prune the set before stacking.
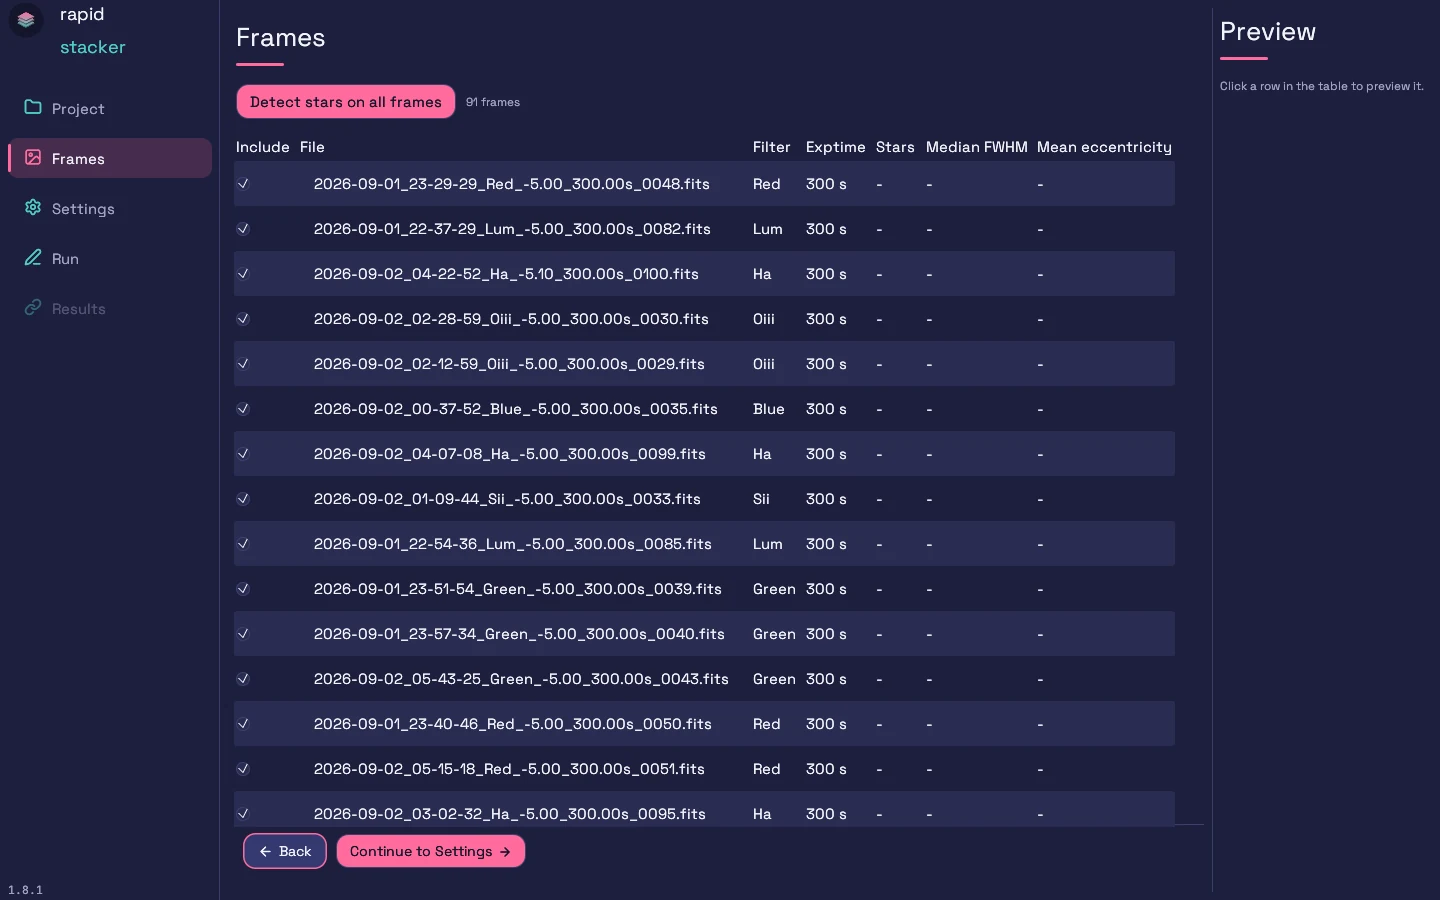
The table has seven columns: Include (a checkbox — untick to exclude a frame from the stack; the count of included frames is shown against the total, and the exclusions carry through to the run and the pre-run summary), File, Filter, Exptime, a Panel column that appears automatically when the scan detects a multi-panel mosaic, and three quality columns — Stars, Median FWHM, Mean eccentricity — which show - until you click Detect stars on all frames. Detection runs in the background across all CPU cores and fills the table in as it goes; you can cancel it mid-run.
The folder scan itself also runs in the background — a large multi-session project shows a “Scanning lights folder…” spinner instead of freezing the window, and a failed scan shows an error card with a Retry scan button.
Click any row to load that frame into the Preview pane on the right — a screen-stretched (STF) rendering of the raw frame, before any calibration. For OSC data the preview is shown undebayered (the raw Bayer mosaic); colour appears after stacking.
OSC auto-detection: the first time a new lights folder is scanned, if the frames carry a Bayer pattern and you’re still on the default Mono profile, Rapid Stacker switches the capture mode to OSC, applies the full OSC preset for you, and says so on screen rather than changing your settings silently. A deliberate Mono choice is respected on rescans.
Continue to Settings moves to the next step — see the Settings reference.